The Comprehensive BloomsyBox Guide to Repotting Plants: Elevate Your Indoor Garden

Welcome to an extensive exploration into the world of repotting, brought to you by BloomsyBox.
Learn how to ensure vibrant growth with our comprehensive BloomsyBox guide to repotting plants
Repotting is more than just a routine task; it's a vital component of plant care that ensures your botanical companions not only survive but thrive. This guide is designed to be your ultimate companion, covering every aspect of repotting.

#1: The Foundation of Repotting
Why Repot?
Repotting isn't just about giving your plant a new home—it's about rejuvenating its environment, ensuring it has the nutrients, space, and conditions needed for optimum growth. Here’s why it matters:
- Nutrient Refreshment: Over time, soil depletes. Repotting replenishes these vital nutrients.
- Root Health: Provides space for roots to grow, preventing compaction and promoting better water and nutrient uptake.
- Disease Management: Offers an opportunity to inspect roots for signs of disease or pests and take corrective action.
#2: Recognizing the Call for Change
Signs It's Time to RepotObserving your plants closely will reveal when they're ready for a new pot. Key indicators include:
- Roots Circling or Escaping: Visible roots growing through drainage holes or circling the surface indicate it's time for more space.
- Watering Challenges: If water runs straight through the pot, the plant may be root-bound. Alternatively, if water sits on the surface, the soil might be compacted or degraded.
- Visible Stress: Slow growth, yellowing leaves, or a generally unhealthy appearance can signal the need for a fresh start.
#3: Preparing for Success
Selecting the Right PotThe right pot is crucial for successful repotting. Consider:
- Size: Typically, choose a pot 2 inches larger in diameter than the current one. Too large, and you risk water retention issues; too small, and you'll be repotting again soon.
- Material: Terra cotta breathes more, reducing the risk of overwatering, while plastic retains moisture longer, suitable for plants preferring wetter conditions.
- Drainage: Ensuring adequate drainage is non-negotiable. Opt for pots with drainage holes to prevent waterlogging.
Choosing the Best Soil
- Type: Select a soil blend that matches your plant’s needs—succulents require different soil than tropical plants.
- Components: Look for mixes with vermiculite or perlite for aeration, peat moss or coco coir for moisture retention, and organic matter like compost for nutrients.


#4: The Repotting Process
A step-by-step walkthrough to ensure a smooth transition:
1. Prep Work: Water your plant a day before repotting for easier removal.
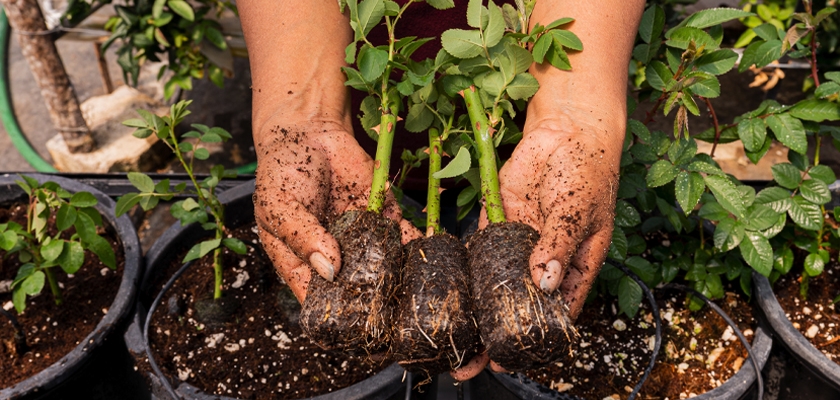
2. The Gentle Unveiling: Carefully remove the plant from its current home, supporting the base and using a tool if necessary.
3. Root Inspection & Pruning: Check the roots for health, trimming away any dead or excessively long ones.
4. Pot Preparation: Add a foundation layer of new soil to the pot for your plant to rest on.
5. Repotting: Place your plant in its new pot, filling around it with fresh soil, pressing gently to secure it without compacting the soil too much.
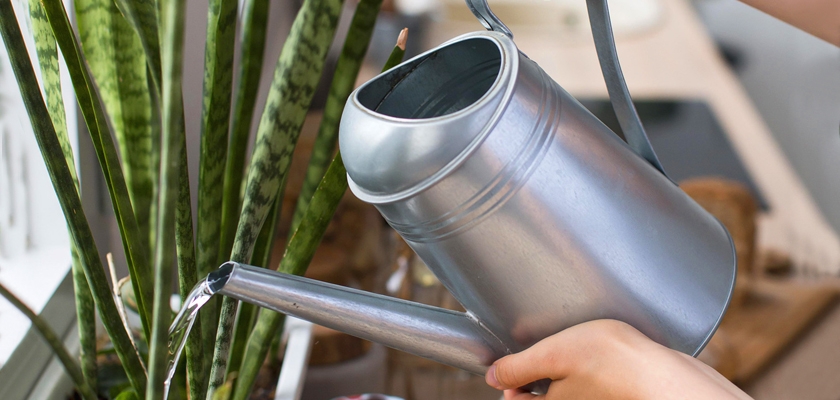
6. The First Watering: Water thoroughly to help settle the soil around the roots and begin the adjustment period.
#5: Post-Repotting Care
The care your plant receives immediately after repotting is crucial for its recovery and continued growth. Focus on:
- Light Exposure: Keep the plant in indirect light initially to reduce stress.
- Watering Needs: Monitor soil moisture closely, as the fresh soil's water retention characteristics might differ from the old soil.
- Observation: Watch for signs of stress or happiness in your plant, adjusting care routines as necessary.
#6: Troubleshooting Common Issues
Post-repotting challenges can arise; here's how to address them:- Leaf Drop or Yellowing: Often a sign of stress; usually temporary as the plant adjusts.
- Wilting: Ensure adequate watering and consider if the plant might be in shock; create a stable environment for recovery.
- Root Rot: If discovered during repotting, trim affected roots, use a fungicide if necessary, and ensure the new pot has excellent drainage.
#4: The Repotting Process
A step-by-step walkthrough to ensure a smooth transition:
1. Prep Work: Water your plant a day before repotting for easier removal.
2. The Gentle Unveiling: Carefully remove the plant from its current home, supporting the base and using a tool if necessary.
3. Root Inspection & Pruning: Check the roots for health, trimming away any dead or excessively long ones.
4. Pot Preparation: Add a foundation layer of new soil to the pot for your plant to rest on.
5. Repotting: Place your plant in its new pot, filling around it with fresh soil, pressing gently to secure it without compacting the soil too much.
6. The First Watering: Water thoroughly to help settle the soil around the roots and begin the adjustment period.
#5: Post-Repotting Care
The care your plant receives immediately after repotting is crucial for its recovery and continued growth. Focus on:
- Light Exposure: Keep the plant in indirect light initially to reduce stress.
- Watering Needs: Monitor soil moisture closely, as the fresh soil's water retention characteristics might differ from the old soil.
- Observation: Watch for signs of stress or happiness in your plant, adjusting care routines as necessary.
#6: Troubleshooting Common Issues
Post-repotting challenges can arise; here's how to address them:- Leaf Drop or Yellowing: Often a sign of stress; usually temporary as the plant adjusts.
- Wilting: Ensure adequate watering and consider if the plant might be in shock; create a stable environment for recovery.
- Root Rot: If discovered during repotting, trim affected roots, use a fungicide if necessary, and ensure the new pot has excellent drainage.


#7: Repotting Special Cases
Certain plants have unique repotting needs:
- Orchids: Require special orchid mix and clear pots to monitor root health.
- Succulents: Prefer dry, fast-draining soil and minimal water post-repotting.
- Large Trees: May only need topsoil replacement or root pruning rather than full repotting.
#8: Celebrating Growth
Repotting is a celebration of growth and an investment in your house plants delivered future. BloomsyBox is here to support you through this process, offering tips, supplies, and encouragement.#7: Repotting Special Cases
Certain plants have unique repotting needs:
- Orchids: Require special orchid mix and clear pots to monitor root health.
- Succulents: Prefer dry, fast-draining soil and minimal water post-repotting.
- Large Trees: May only need topsoil replacement or root pruning rather than full repotting.
#8: Celebrating Growth
Repotting is a celebration of growth and an investment in your house plants delivered future. BloomsyBox is here to support you through this process, offering tips, supplies, and encouragement.
By following this guide, you’re ensuring that your indoor garden remains a vibrant, thriving oasis of green. Remember, every plant has its own story and needs, so use this guide as a compass rather than a map, and enjoy the beautiful journey of plant parenthood with BloomsyBox.
By following this guide, you’re ensuring that your indoor garden remains a vibrant, thriving oasis of green. Remember, every plant has its own story and needs, so use this guide as a compass rather than a map, and enjoy the beautiful journey of plant parenthood with BloomsyBox.